It took me longer to get back to this than I wanted, but yesterday I restarted the project. My wife came with me, and supervised (she sat in a fold-up soccer chair and did some studying). I put a second layer of epoxy to build up the repair in preparation for the fiberglass, and let that dry overnight.
This morning, I assembled all of my tools and headed off to the boatyard. I stopped by the ACE hardware store to pick up some 80 grit sandpaper on the way to help knock down some of the epoxy. I noticed yesterday that it was pretty hot, and the epoxy was taking a little longer to dry, but I played with it (it was almost moldable) to keep it from deforming too much.
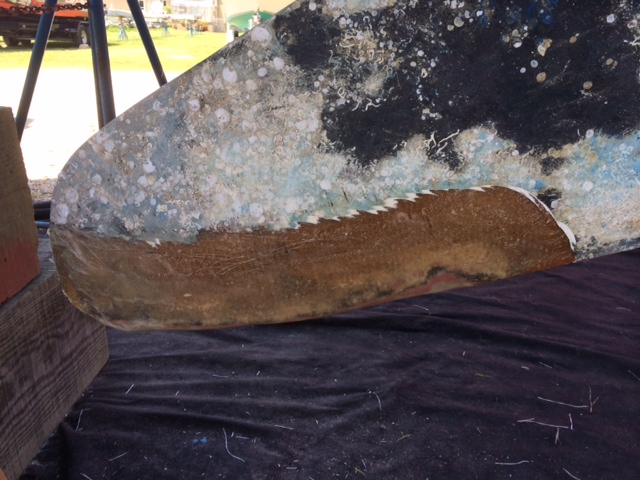
Unfortunately, when I arrived this morning, since the keel requires the work to be upside down, the epoxy did sag a little. It was enough that the 80 grit would have taken me much too long, so I reached for my angle grinder and... I realized that I left it at home. Oh well, it was only a 5 minute drive away.
So I went back home, grabbed the angle grinder (and lunch) and headed back. I easily ground away the epoxy (I used a 50 grit sanding disc). The tool was very easy to use this time, and I was able to shape the epoxy layer just the way I wanted it. Once I was done with that, I gathered up everything that I needed for the fiberglass work.
This morning, I assembled all of my tools and headed off to the boatyard. I stopped by the ACE hardware store to pick up some 80 grit sandpaper on the way to help knock down some of the epoxy. I noticed yesterday that it was pretty hot, and the epoxy was taking a little longer to dry, but I played with it (it was almost moldable) to keep it from deforming too much.
Unfortunately, when I arrived this morning, since the keel requires the work to be upside down, the epoxy did sag a little. It was enough that the 80 grit would have taken me much too long, so I reached for my angle grinder and... I realized that I left it at home. Oh well, it was only a 5 minute drive away.
So I went back home, grabbed the angle grinder (and lunch) and headed back. I easily ground away the epoxy (I used a 50 grit sanding disc). The tool was very easy to use this time, and I was able to shape the epoxy layer just the way I wanted it. Once I was done with that, I gathered up everything that I needed for the fiberglass work.

I bought a plastic drop sheet from ACE earlier in the morning, and used that to template the repair. I started with three sheets of fiberglass - each sheet is about 1 mm, so I need to lay enough fiberglass for strength and to get the layer depth to the original thickness. However, before I'm done, I'm going to lay on a layer of epoxy with 407 filler layer for fairing, so I needed to leave enough thickness for that.
First, I cleaned up the area of the repair with acetone. Then I mixed up a bunch of epoxy, and wet out the area on the keel. Finally, I wet out each layer of fiberglass, stacking them up, with the largest piece going on the keel first. This repair wasn't small - it was about 24 inches long, and irregularly shaped. And it was upside down.
So, once everything was ready (and my gloves were incredibly sticky), I gathered everything up and stuck the patch on. I messed with it a bit, getting out the air bubbles (I mostly used my fingers then a little plastic squeegee - I think I had more control with my fingers).
Once I was done, I was very happy with the results. I still have a little air gap between my core-covering-epoxy and the fiberglass, but I intend to fill that by drilling a hole and pouring in some epoxy for strength.
This project is almost done!
 RSS Feed
